
I think you’ll agree with me when I say:
Yoast SEO is REALLY confusing when you first fire it up.
But, does it have to be?
Ok, yes, there are a lot of options to check, change and turn on or off…
…but in all honesty, I use it for all of my clients and use mostly the same settings 90% of the time.
I’ve got you covered.
I’m going to show you, not only those settings I normally use, but also why I use them, what they do exactly and why you may or may not want to use them as well.
Disclaimer: This is not meant for you just to go and copy every setting. You really should learn what each one does before you change anything, and I do my best to give simple explanations of what each setting does exactly.
Use this guide at your own risk. I take no responsibility if you mess up a site because you went through and blindly copied what I say I normally do. You should always get help from a professional before you make changes like these.
Yoast Cheat Sheet
Download the same resource that we use to quickly get our clients’ WordPress site SEO ready with Yoast.
Dashboard/General Settings
Dashboard
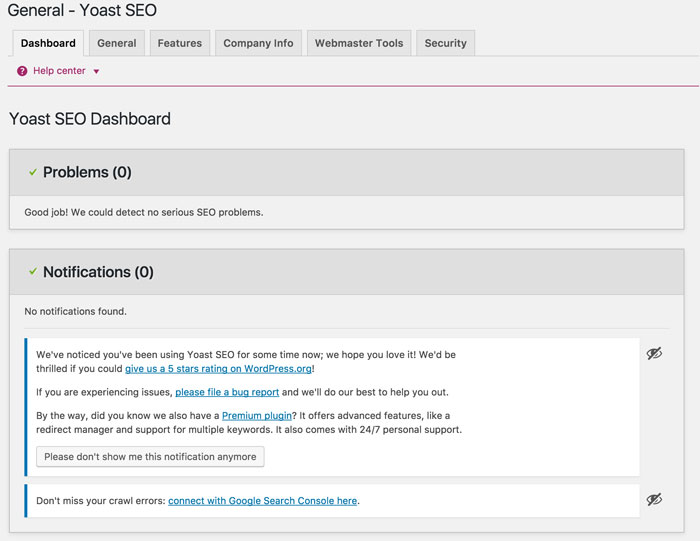
Problems
If Yoast detects any serious SEO problems (like your site tagline still says “Just another WordPress site”) it will let you know about it here.
Notifications
Other notifications pertaining to Yoast will show up here.
General
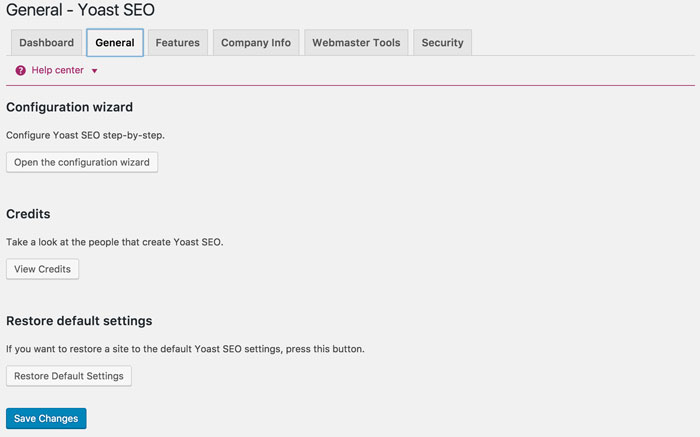
Configuration wizard
This is a easy to use wizard that attempts to give you the correct setting for your site based off of answering simple questions. You won’t need it since you’re reading this guide 🙂
Credits
Takes you to a page crediting everyone involved with the Yoast plugin.
Restore Default Settings
This Reverts the settings that were there when you first installed the plugin.
Features
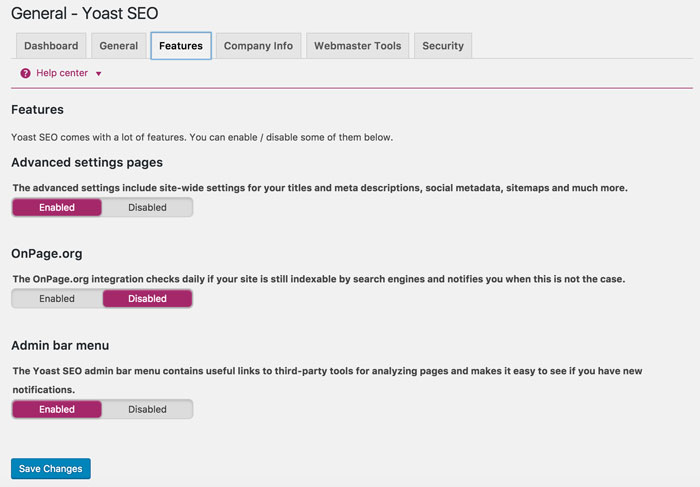
Advanced settings pages
This setting enables and disables most of the plugins customizability. If you’re reading this you’re going to want to leave it enabled.
OnPage.org
This is an integration with OnPage.org to check the indexability of your pages. I don’t use this. You should be fine as long as you’re not purposely telling search engine to stay away.
That being said, OnPage.org is awesome for crawling and auditing websites.
This will enable and disable this nifty little guy below…

Company Info/Your Info
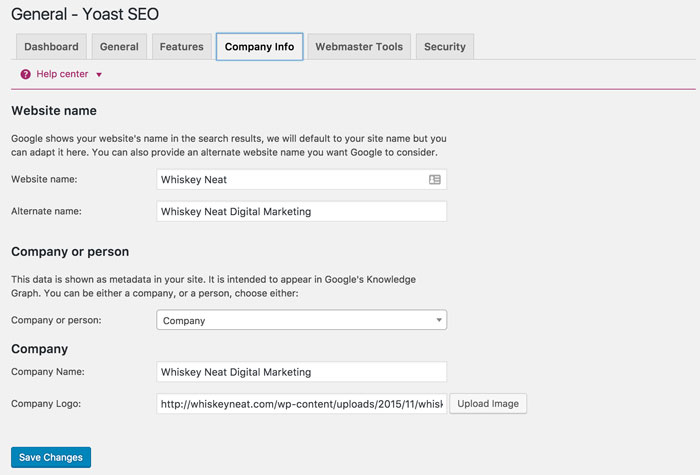
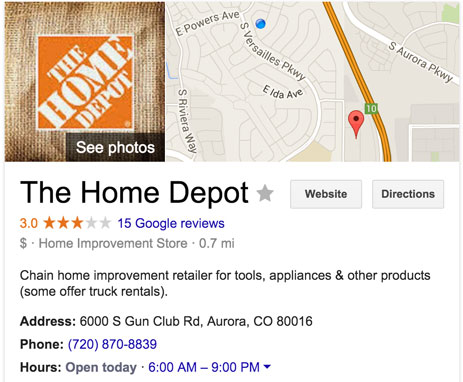
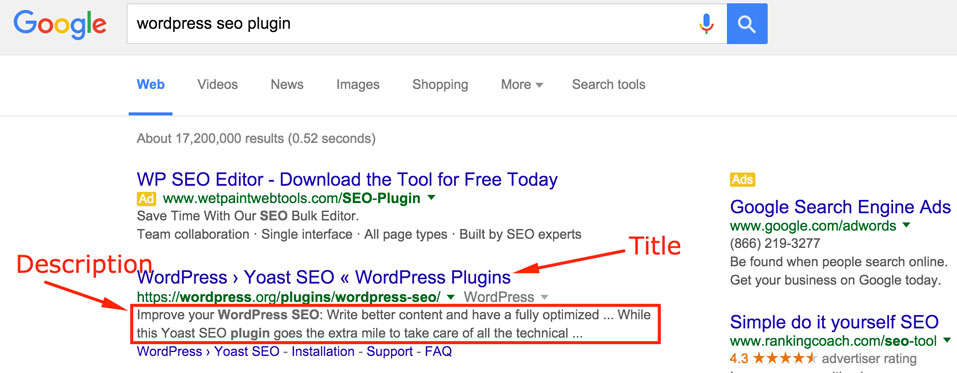
This section adds some code in the HTML that lets Google know what the name of your site is. It will use the site name when displaying your site as a result in a mobile SERP.
For instance, instead of showing your actual domain name, it will look something like this:
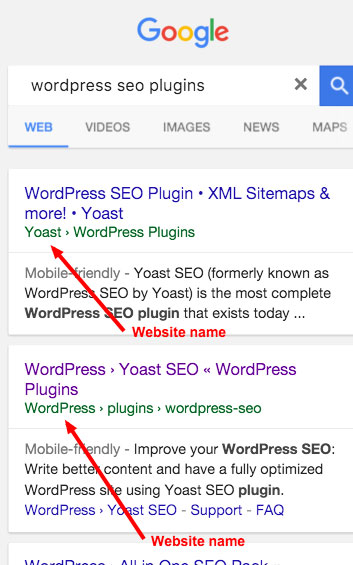
Website name

The way you would like your website name to appear in mobile SERPS.
Why I do that: Because that’s what Google wants and it looks cool.
- Be reasonably similar to your domain name
- Be a natural name used to refer to the site, such as “Google,” rather than “Google, Inc.”
- Be unique to your site—not used by some other site
- Not be a misleading description of your site
You can take a look at what Google says about Structured Data and Site Name here.
Why you may not want to do that: You would just like your domain to show up in search results.
How it works: Adds “name” value to the “WebSite” Schema in the <head> of your page. Like “Whiskey Neat”, highlighted in the example below.
<script type='application/ld+json'>
{
	"@context" : "http:\/\/schema.org",
	"@type" : "WebSite",
	"url" : "https:\/\/whiskeyneat.com\/",
	"name" : "Whiskey Neat",
	"alternateName" : "Whiskey Neat Digital Marketing",
}
</script>
Resources
Alternate name

An alternate version of your website name that Google will consider. This is optional.
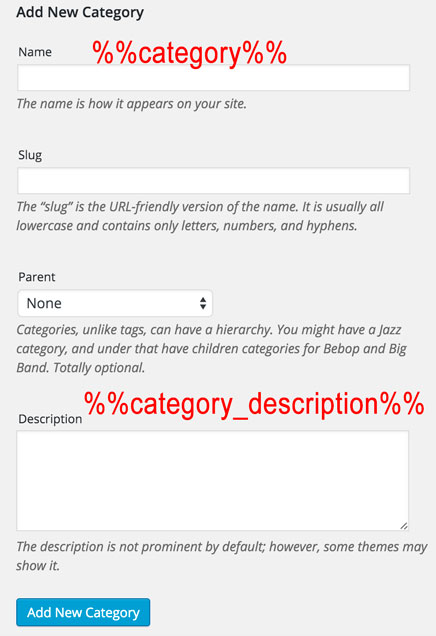
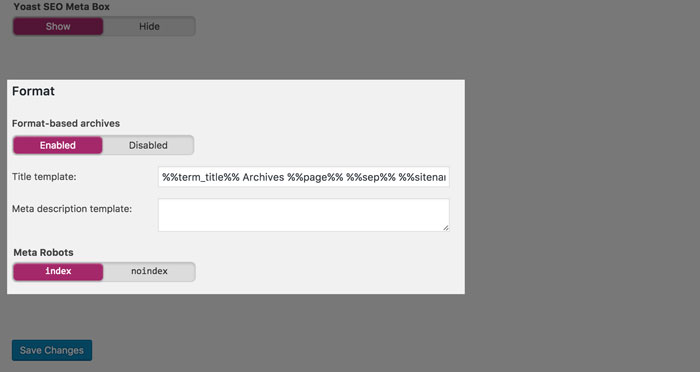
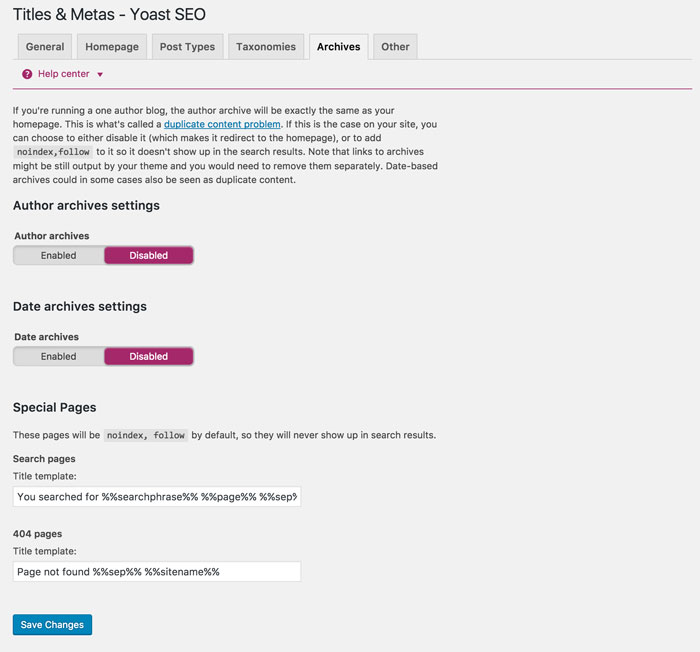
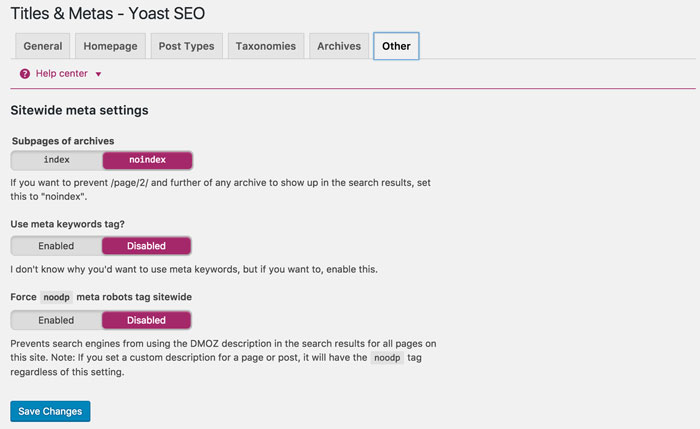
Why I do that: I usually put the shorter and more natural sounding version in the main Website name box above. If their legal name or the name I use for directories online is different than that, I’ll use it here (“Google, Inc.” vs. “Google”). Why you may not want to do that: If there is no alternate name you can think of just leave it blank. How it works: Adds “alternateName” value to the “WebSite” Schema in the <head> of your page. Like “Whiskey Neat Digital Marketing”, highlighted in the example below. Resources This tells Google whether your site is about a person or a company. Pick the most relevant one. How it works: Changes the Schema type to “organization” or “person” as the examples highlighted below. If you choose “Company” it will change the type to “Organization” like this: If you choose “Person” it will change the type to “Person” like this: This only shows up if you chose Company above. Enter your company name here. This helps Google organize your company information and list you correctly in its “Knowledge Graph”. Why I do that: To keep things consistent across the board. Why you may not want to do that: Can’t think of a reason not to this unless you’re not an organization or a person. How it works: This adds your name to the “name” field in the “Organization” Schema. An example is highlighted below. This only shows up if you chose Company above. Add a URL for your company logo (you can just click “Upload Image” to upload or choose an image from your site’s Media Library. This helps Google know what you prefer as your logo and adds this information to its “Knowledge Graph.” Why I do that: I just think it looks nice. And it’s how Google shows brand logos in its Knowledge card on the right. Why you may not want to do that: Maybe you don’t have a logo. How it works: This adds the URL for you preferred logo to the “logo” field in the “Organization” Schema. An example is highlighted below. This only shows up if you chose Person above. Why I do that: So everything is consistent. Why you may not want to do that: No reason not to. How it works: This adds your name to the “name” field in the “Person” Schema. An example is highlighted below. This is where you add code to verify your site with Alexa, Bing, Google and Yandex to be able to use their Webmaster Tools. Why I do that: To see what Bing and Google think about the site. I have never used Yandex’s Webmaster Tools, and I normally validate Google Search Console with analytics. Why you may not want to do that: You’re a rebel, and you don’t care what anyone else thinks about your site. How it works: It adds a meta element in the <head> section of your site’s HTML that proves to the service that you are a webmaster of the site. Resources: Here there is just one toggle to Enable or Disable the “Advanced part of the Yoast SEO meta box.” This disables Yoast’s “Advanced” tab when you’re editing posts, but only for author level accounts. Admin accounts will see this tab regardless. Why I do that: Because I normally don’t work on sites with authors that I don’t trust. Why you may not want to do that: If your site has multiple authors that may not know what they’re doing or you don’t completely trust them, you may want to keep it checked. How it works: It makes it look, to authors, like it’s not even there. They are blissfully unaware. This section lets you customize how the page Title and Description meta tags display information. How it works: It makes it look, to authors, like it’s not even there. They are blissfully unaware. Why I do that: From what I understand it will slow down your site slightly. There’s no reason to do that if you don’t have to. Why you may not want to do that: Sometimes the way themes are coded may prevent the Yoast SEO plugin from customizing the title this would be necessary. How it works: It uses something called Output Buffering. I’m no programmer, but I think it lets WordPress partially create the page, looks at the HTML before it’s displayed in your browser and changes it if necessary. Joost de Valk, the developer of Yoast SEO, refers to this as a “rather simple explanation” of the process. This is where you pick the separator between page name and site name. So, if this posts’ title was “Yoast Seo Settings”, the site name is “Whiskey Neat” and you picked the pipe as a separator, the title would come out like this by default: “Yoast SEO Settings | Whiskey Neat.” Why I do that: Because those are what are usually used, and visitors are more accustomed to. Why you may not want to do that: Because pipes and dashes are just too mainstream for you. You need to be unique and stand out from the crowd. This will Enable and Disable the reading analysis section in the Yoast Meta Box in individual posts (shown below). I don’t really use it, but it gives some cool data. If you don’t use it then urn it off. If you do, leave it on. This removes the Keyword Analysis section in the Yoast Meta Box in individual posts (shown below). I don’t use this, personally. If you feel it helps you with your posts then leave this enabled. Why I do that: Because the themes I normally use have a custom page to set the homepage and the Yoast SEO settings on that page will override this. Why you may not want to do that: Your theme doesn’t work that way, and this is the only way you can change the title and description on your homepage. Why I do that: These are general default settings that automatically create the title and description on every post and page on your site. However, these settings are overridden by what you add in Yoast SEO on those specific pages. I always customize those, and I think you should too. The Media part I take care of in the Advanced > Permalinks section. Any other post types you see here are specific to your theme or another plugin you have installed, and you’ll have to use your own discretion. Why you may not want to do that: If you have a site with a TON of posts and pages, and there’s no way you could customize them all I’d probably still leave them as they are unless you can think of something you REALLY want on there, I’ll show you how to change that below. But I would definitely start customizing the title and descriptions on your most popular pages and work your way down. How it works: The variables in these fields pull that information for specific pages. For instance, %%title%% will take the title you wrote at the very top of the page and add it in this spot. For a list of variables click the Help dropdown on the top right of the screen when you’re in the Titles & Metas section of the Yoast SEO plugin. Why I do that: These pages will be all duplicate content from the posts that they are showing. Unless you are customizing each category page, you probably want to noindex them. I add the title template because I think it looks better to users. And the description because why not? Why you may not want to do that: Like I said above, if you’re getting a lot of traffic to them (check your analytics) or you have customized them you may want to let Google index them. How it works: The “noindex, follow” adds some code to your HTML that tells bots (like Googlebot) not to index this particular page. %%category%% – this adds the category name to the title tag. %%page%% – This adds the current page number in this category in context (Page 3 of 6). %%category_description%% – adds whatever you added in the description box on the category pages. Why I do that: I don’t remember the last time I used tags and they are never an important part of the site structure. They just create a lot of pages that Google will have to crawl for no reason and waste your sites crawl budget. Why you may not want to do that: They are important to the usability of your site. I would, probably in every case, leave it as-is and set this to “noindex, follow”, though. I just leave this as it is. I’ve never used any of the post formats. If I did, I would probably always leave it as “noindex, follow” as it would create additional archives or categories and that would ideally be worked out in the category section. Any other Taxonomies you see here are specific to your installation. They may have been put there by your theme or a plugin you have installed. Why I do that: I don’t touch any of the templates because I am disabling the author and date archives all-together. They just create duplicate content and unnecessary pages. Why you may not want to do that: If you have a site with multiple authors, and you want visitors to be able to browse articles by author then do not disable the Author Archive. If it is absolutely necessary that visitors be able to browse by date, then leave the date-based archives enabled. How it works: When you disable the author archives, it will redirect the author URL to the homepage. The date archives will just not exist. Why I do that: This is a bit redundant. Since I already disabled the archives, it’s a setting for something that doesn’t even exist anymore. I do it to kick the archives while they’re down. Why you may not want to do that: I don’t know. If you still have them enabled, I would still, more than likely, have them noindexed all-together in the previous Archives tab. How it works: If you had the archives enabled and there were multiple pages, this would allow only Page 1 to be indexed. All subsequent pages would not be. Why I do that: There is no reason to use meta keywords. Google has said they do not use them at all, and Bing actually sees them as a spam signal if it thinks you’ve overused them. Why you may not want to do that: I can’t think of a reason to turn this on. How it works: If you check this box, there will be a new field to add meta keywords on the Yoast SEO box when editing a page. Why I do that: It’s usually not needed and just adds a line of code in your HTML. Why you may not want to do that: It’s a problem if your description in the SERP looks like nothing on that page, and you don’t like it. How it works: This stands for “No Open Directory Project” which is DMOZ (dmoz.org). It adds a line of code in your site’s HTML that tells the search engines not to use your site’s description from DMOZ when listing it in the SERPs. Sometimes they may use the description for a site in DMOZ instead of the one provided in the meta description on the page. This has happened to me once ever and forced me to enable this setting. Why I do that: Gives the search engines more info about you or your company. Why you may not want to do that: Perhaps if you have personal accounts that you really don’t want to be associated with your site, you would keep those out. How it works: This adds more schema code that helps Google organize the information it has about your business in its Knowledge Graph. It uses the “sameAs” property to indicate that it is an official property of the person or organization. Why I do that: It adds the Open Graph data to every page on your site and enables you to customize it for each post and page in the Yoast box Social tab. Why you may not want to do that: You have another plugin doing this. How it works: It adds meta data that Facebook (and other social media sites) use to categorize and display your page. Why I do that: Better to customize it and have what I want to represent my site. Why you may not want to do that: If your homepage is a regular page that you’re using as the homepage in WordPress, then the settings on that page will probably override this. How it works: This lets you set up the Image, Title and Description when your homepage is shared. Why I do that: If there are no images on your page being shared at least it gives some option with your brand on it. Why you may not want to do that: No real reason not to. How it works: Adds Open Graph meta tags to tell Facebook the image you would like to use when the page is shared. Why I do that: Lets me see audience insights about my site. Why you may not want to do that: No real reason not to. Unless you just don’t care to see them. How it works: Adds an admin to the Open Graph code that tells Facebook you are an admin of the site. Why I do that: It lets you set the title, description, and image that shows up when someone shares pages from your site on Twitter. Why you may not want to do that: No reason not to. Unless you just want to let Twitter fall back onto Facebook’s Open Graph data. How it works: This is basically Twitter’s version of Open Graph. In fact, if Twitter doesn’t see Twitter Card meta on a page it will look for Open Graph and use that. Checking this box will let you customize this on all pages. Why I do that: To verify the site with their Pinterest account. Why you may not want to do that: You don’t have Pinterest. How it works: Add the bit of code that Pinterest gives you to your site’s <head> Why I do that: This lets you verify that the Google+ page is the official one for this site. Don’t forget to add your site to the Google+ “About” page as well. Why you may not want to do that: You don’t have a Google+ page. How it works: It adds a snippet of code that shows that this Google+ page is the official page for this site. Why I do that: Yoast will create an XML sitemap for me. Why you may not want to do that: You’re using another sitemap or plugin. Or you need a little more functionality (like adding pages that aren’t a part of your WordPress install). How it works: It creates a sitemap_index.xml file that you can submit to the search engines. Just add that to the end of your domain. For instance, the XML sitemap for this site is: https://whiskeyneat.com/sitemap_index.xml Why I do that: Because 1,000 seems like a nice round number. Can be up to 10MB and 50,000 URLs. Why you may not want to do that: I’ve heard of people have issues with memory on their server. If you have that or any issue at all, try a lower value. How it works: If you have more pages in WordPress than you have entered here than it will create multiple pages. Why I do that: Because I usually have the archives disabled anyways. Why you may not want to do that: Because you didn’t disable author archive. Maybe you have a multi-author blog. How it works: Creates sitemaps with the posts from different users. Why I do that: Usually have other types set to noindex. Why you may not want to do that: Other types are important content on your site that you have indexable. How it works: If you check a box next to a post type, it simply will not add that type to the sitemap. Why I do that: Those are usually pages and would show up in the sitemap by default. Why you may not want to do that: You want all WordPress pages to be in the sitemap. How it works: You add posts by their Post ID. To find the ID, you can go to edit the page and look at the link on the “Get Shortlink” button. It will say something like ?post=234 in the URL. The number there is the Post ID. Why I do that: Because I usually only use the Category taxonomy. Why you may not want to do that: There is another taxonomy that your site uses, and it’s important. Leave that type unchecked. How it works: It simply won’t add the checked taxonomy types to the sitemap. Why I do that: Because I’m usually using a theme that has it built in. Why you may not want to do that: Your theme doesn’t have it built-in. This requires customizing your themes files to add it. If I do use it, I set the taxonomy to show in breadcrumbs for posts to Category. How it works: This adds links at the top of your pages that show users where they are and “indicates the page’s position in the site hierarchy” More info: https://developers.google.com/structured-data/breadcrumbs If your theme does not have breadcrumbs built in and you need to add it yourself, Yoast has a small tutorial here: http://kb.yoast.com/article/245-implement-wordpress-seo-breadcrumbs Why I do that: Personal preference. Why you may not want to do that: If you’d rather your site look like “example.com/seo/” instead of “example.com/category/seo/” you’ll want to check this box. How it works: It removes the category from the category URL (this category base name can also be changed in WordPress’ Settings > Permalinks). Why I do that: When you upload a picture to WordPress on a post, it will create a separate attachment page for that image. These are basically useless pages that add no value to the user experience and just create thin content on your site. Why you may not want to do that: Can’t think of a reason not to. How it works: It redirects the link from these useless pages to the one the media is attached to. Why I do that: It removes words like “a” and “by” from the URL that’s created in a new post. You can still customize the URL if you want (which I usually do). Why you may not want to do that: You want every word in your post’s title to be in the URL. How it works: When you create a new post (depending on how you have Permalinks set), WordPress will make the URL the Title of your post with dashes in between each word. This removes less descriptive terms. Why I do that: It can create a lot of extra crawling for search engines if there are a lot of comments. Why you may not want to do that: The ?replytocom is a fallback URL for replying to comments when JavaScript is disabled. With this checked there is not fallback anymore. If you’re worried about that, don’t check it. How it works: Removes the fallback URL for users without JavaScript. Why I do that: Read the paragraph that Joost puts above this feature. It doesn’t sound very enticing. The once in a while someone links to me in a weird way I contact them and ask to update it, or I’ll add a redirect myself. Why you may not want to do that: The ugly URLs really have to be bothering you for you to want to check this. If you’re absolutely positive it won’t mess something up then go for it. How it works: Automatically adds redirects to URLs with unwanted parameters. Why I do that: It’s fine that way. Why you may not want to do that: You want your RSS feed to have different content. How it works: This adds extra content to your posts in your RSS feed. By default, it’s set up to link back to your homepage and to the post itself. This is good because some applications go around the internet scraping data. When they scrape your RSS feed, it will also scrape these links. So wherever that scraped content gets added will also add these links. This helps search engines know that yours is the original article. These are not necessarily setting that affect the SEO of your site, but they are neat little tools that help make some things a little easier for you. This is my favorite of the three tools here. It allows you to change the title and descriptions for each page straight from here instead of having to edit every single page individually. This saves you a lot of time waiting for pages to load when you have more than a few to change. A life-saver when you’re coming into an existing site. I don’t use this that much. I tend to use FTP for these things. But if you need to edit the robots.txt and .htaccess files and don’t have FTP access this is one way you could do that. This will allow you to import and export Yoast settings to use for another site or the same site at a different time. You can also import SEO settings from other SEO plugins. The current list is HeadSpace2, All-in-One-SEO, and the WooThemes SEO framework. This section will bring in 404 errors from Google’s Search Console once you’ve authenticated your site with your Search Console account. If you own the Premium version of Yoast SEO, it will also allow you to easily create redirects directly from here. I have never personally purchased any of these. They do add some very useful functionality and judging from the Free version of this plugin I think they would be very well worth the small investment. Download the same resource that we use to quickly get our clients’ WordPress site SEO ready with Yoast.<script type='application/ld+json'>
{
"@context" : "http:\/\/schema.org",
"@type" : "WebSite",
"url" : "https:\/\/whiskeyneat.com\/",
"name" : "Whiskey Neat",
"alternateName" : "Whiskey Neat Digital Marketing",
}
</script>
Company or person

<script type='application/ld+json'>
{
	"@context" : "http:\/\/schema.org",
	"@type" : "Organization",
	"url" : "https:\/\/whiskeyneat.com\/",
	"sameAs" : ["https:\/\/www.facebook.com\/WhiskeyNeatDigitalMarketing","https:\/\/twitter.com\/_WhiskeyNeat"],
	"name" : "Whiskey Neat Digital Marketing",
	"logo" : "https:\/\/whiskeyneat.com\/wp-content\/uploads\/2015\/11\/whiskeyNeatProfileLogoSquare.jpg"
}
</script>
<script type='application/ld+json'>
{
	"@context" : "http:\/\/schema.org",
	"@type" : "Person",
	"url" : "https:\/\/whiskeyneat.com\/",
	"sameAs" : ["https:\/\/www.facebook.com\/WhiskeyNeatDigitalMarketing","https:\/\/twitter.com\/_WhiskeyNeat"],
	"name" : "Chuck Sharpsteen"
}
</script>
Company Name

<script type='application/ld+json'>
{
	"@context" : "http:\/\/schema.org",
	"@type" : "Organization",
	"url" : "https:\/\/whiskeyneat.com\/",
	"sameAs" : ["https:\/\/www.facebook.com\/WhiskeyNeatDigitalMarketing","https:\/\/twitter.com\/_WhiskeyNeat"],
	"name" : "Whiskey Neat Digital Marketing",
	"logo" : "https:\/\/whiskeyneat.com\/wp-content\/uploads\/2015\/11\/whiskeyNeatProfileLogoSquare.jpg"
}
</script>
Company Logo

<script type='application/ld+json'>
{
	"@context" : "http:\/\/schema.org",
	"@type" : "Organization",
	"url" : "https:\/\/whiskeyneat.com\/",
	"sameAs" : ["https:\/\/www.facebook.com\/WhiskeyNeatDigitalMarketing","https:\/\/twitter.com\/_WhiskeyNeat"],
	"name" : "Whiskey Neat Digital Marketing",
	"logo" : "https:\/\/whiskeyneat.com\/wp-content\/uploads\/2015\/11\/whiskeyNeatProfileLogoSquare.jpg"
}
</script>
Your name

<script type='application/ld+json'>
{
	"@context" : "http:\/\/schema.org",
	"@type" : "Person",
	"url" : "https:\/\/whiskeyneat.com\/",
	"sameAs" : ["https:\/\/www.facebook.com\/WhiskeyNeatDigitalMarketing","https:\/\/twitter.com\/_WhiskeyNeat"],
	"name" : "Chuck Sharpsteen"
}
</script>
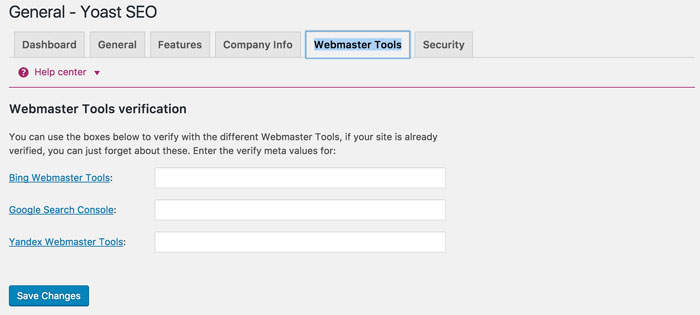
Webmaster Tools
<html>
	<head>
		<title>Title of example page</title>

		<meta name=”alexaVerifyID” content=”NSHFJBKJGDD77854SBJSGSDHJ” />
		<meta name="google-site-verification" content="jJAFDnjsjJBJsbjdfbjsJBJBD" />
		<meta name=”yandex-verification” content=”NDHSHDH73nNDHHJD8786rdjhBFJDBJ” />

	</head>
	<body>
		<p>Content</p>
	</body>
</html>
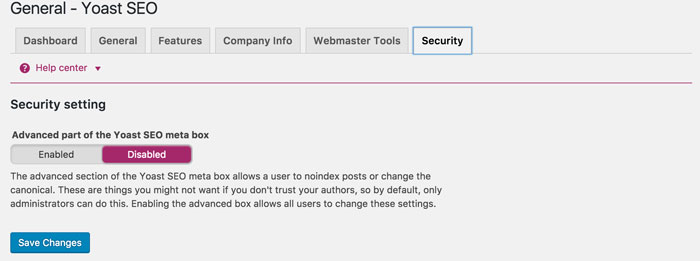
Security
Titles & Metas
General
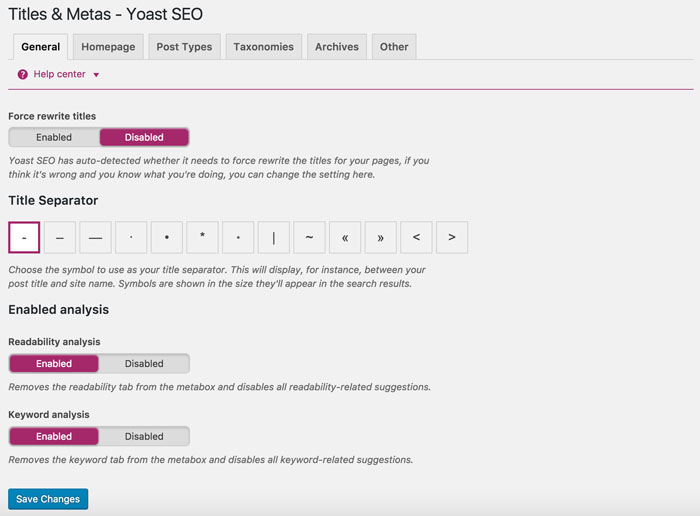
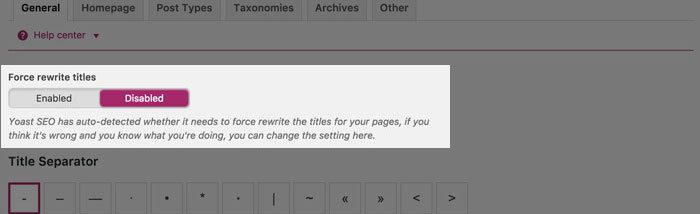
Force Rewrite Titles
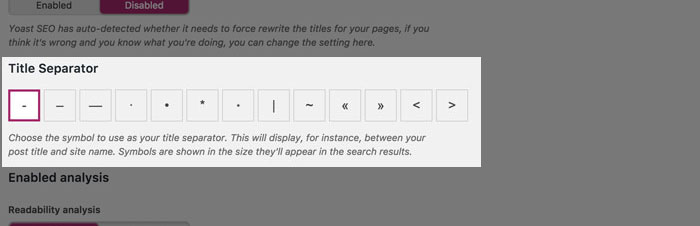
Title Separator
Enabled Analysis
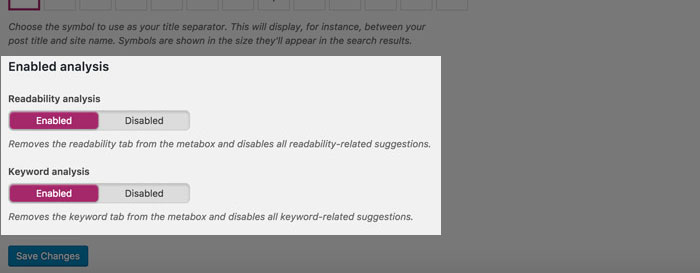
Readability Analysis

Keyword Analysis

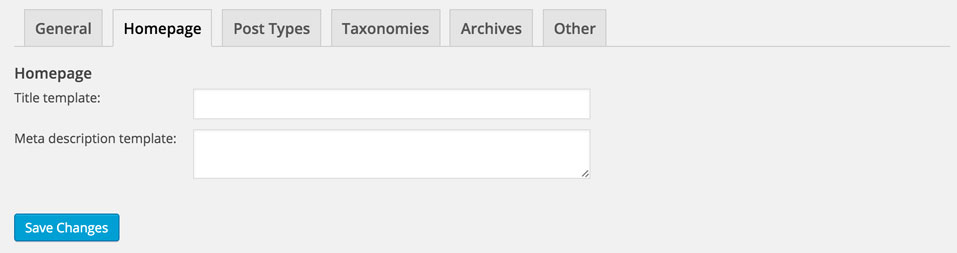
Homepage
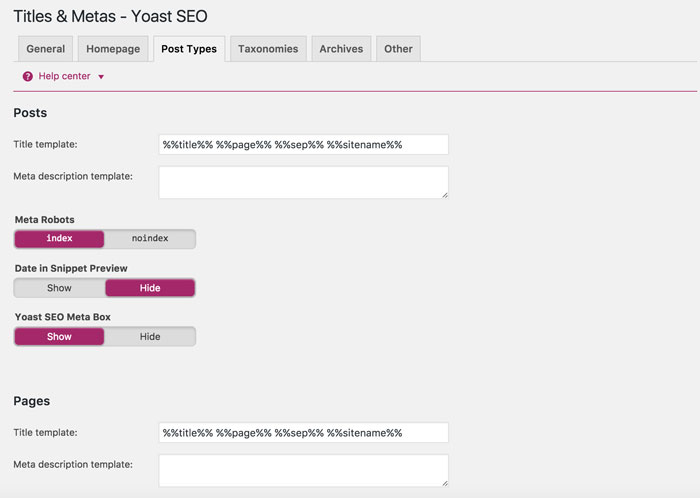
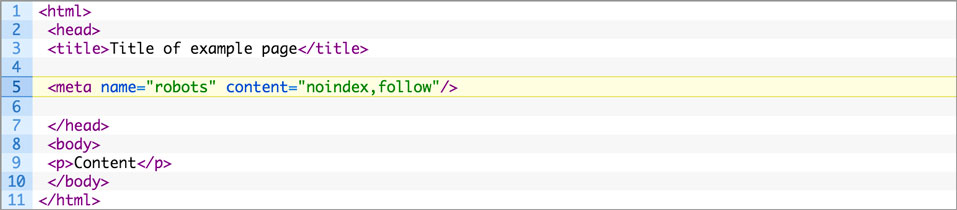
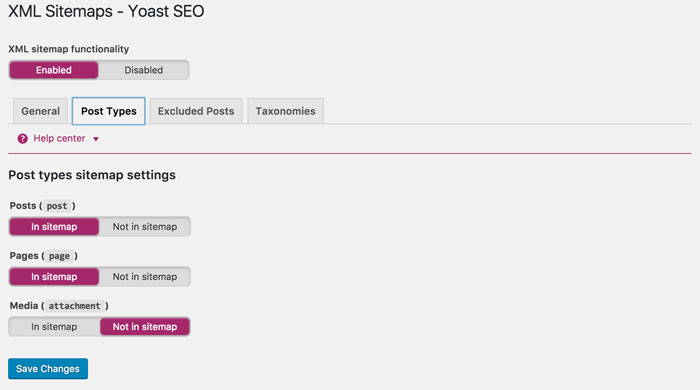
Post Types
Taxonomies

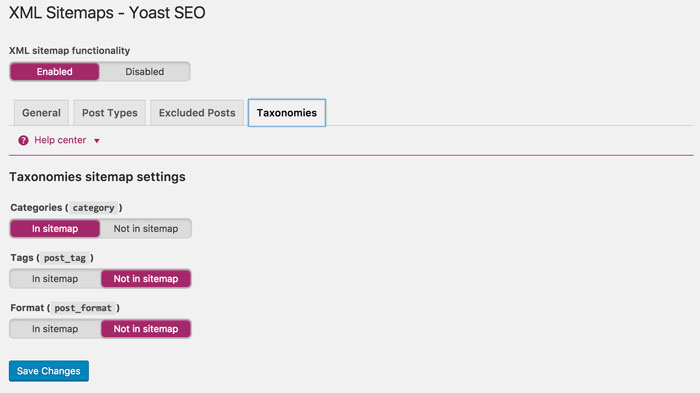
Categories

Tags

Format
Archives
Other
Subpages of archives
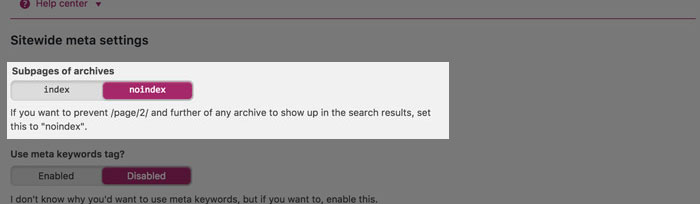
Use meta keywords tag?
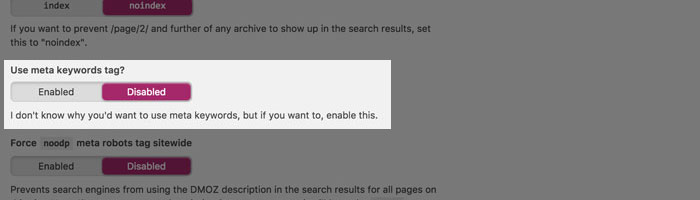
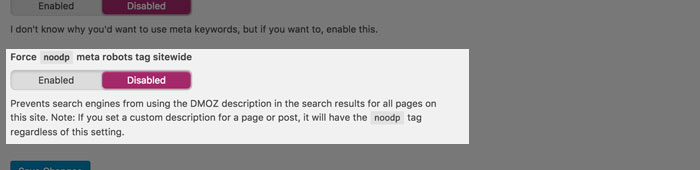
Force noodp meta robots tag sitewide
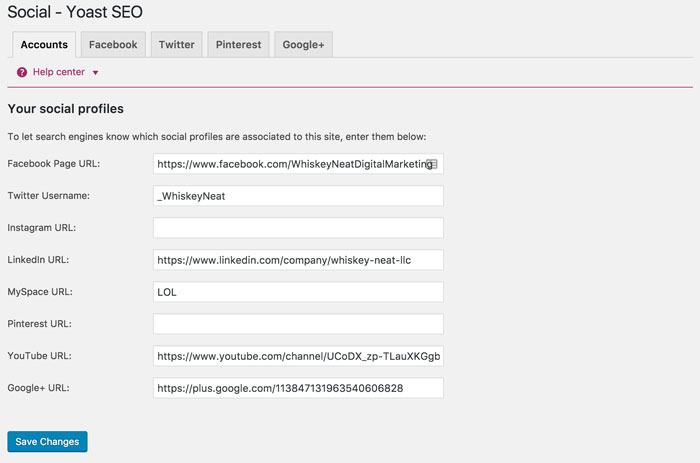
Social
Accounts
<script type='application/ld+json'>
{
	"@context" : "http:\/\/schema.org",
	"@type" : "Organization",
	"url" : "https:\/\/whiskeyneat.com\/",
	"sameAs" : ["https:\/\/www.facebook.com\/WhiskeyNeatDigitalMarketing","https:\/\/twitter.com\/_WhiskeyNeat"],
	"name" : "Whiskey Neat Digital Marketing",
	"logo" : "https:\/\/whiskeyneat.com\/wp-content\/uploads\/2015\/11\/whiskeyNeatProfileLogoSquare.jpg"
}
</script>
Facebook
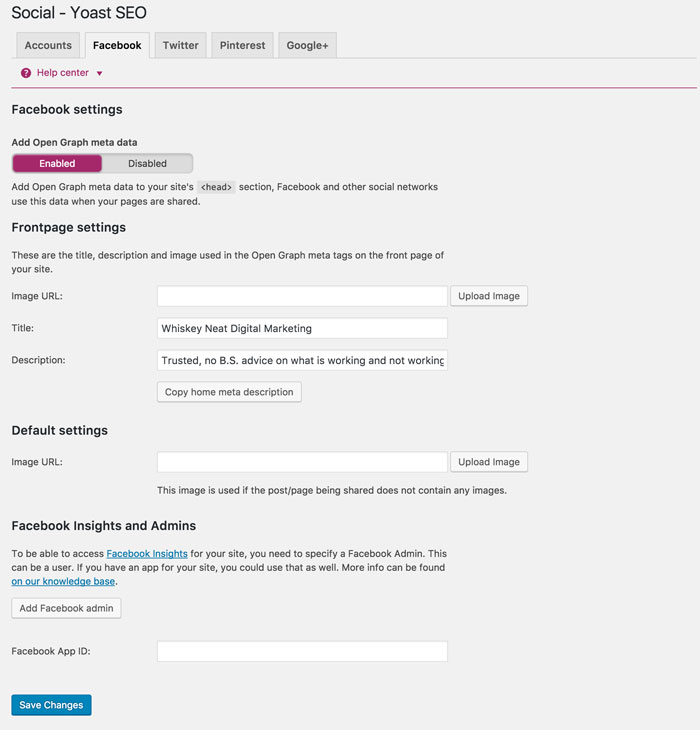
Add Open Graph meta data

<html>
	<head>
		<title>Title of example page</title>

		<meta property="og:locale" content="en_US"/>
		<meta property="og:type" content="article"/>
		<meta property="og:title" content="Custom Title for facebook here"/>
		<meta property="og:description" content="Custom description for Facebook here"/>
		<meta property="og:url" content="https://whiskeyneat.com/fictional-facebook-url"/>
		<meta property="og:site_name" content="Whiskey Neat Digital Marketing"/>
		<meta property="article:publisher" content="https://www.facebook.com/WhiskeyNeatDigitalMarketing"/>
		<meta property="article:section" content="Uncategorized"/>
		<meta property="article:published_time" content="2015-11-21T19:20:39+00:00"/>
		<meta property="article:modified_time" content="2015-11-21T15:46:46+00:00"/>
		<meta property="og:updated_time" content="2015-11-21T15:46:46+00:00"/>
		<meta property="fb:admins" content="1077600236"/>
		<meta property="og:image" content="https://whiskeyneat.com/wp-content/uploads/2015/11/Yoast-SEO-HeaderSocial-Image.jpg"/>

	</head>
	<body>
		<p>Content</p>
	</body>
</html>
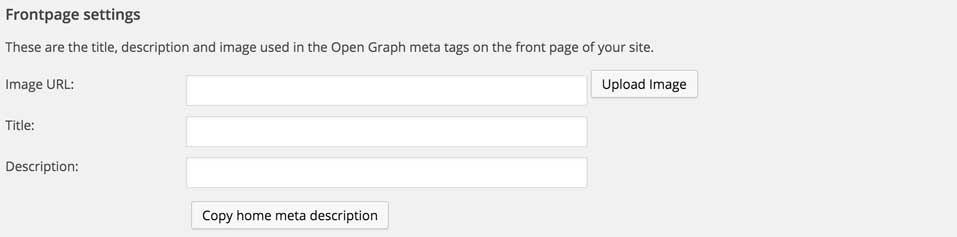
Frontpage setting
Default settings

<html>
	<head>
		<title>Title of example page</title>

		<meta property="og:image" content="https://whiskeyneat.com/wp-content/uploads/2015/11/Yoast-SEO-HeaderSocial-Image.jpg"/>

	</head>
	<body>
		<p>Content</p>
	</body>
</html>
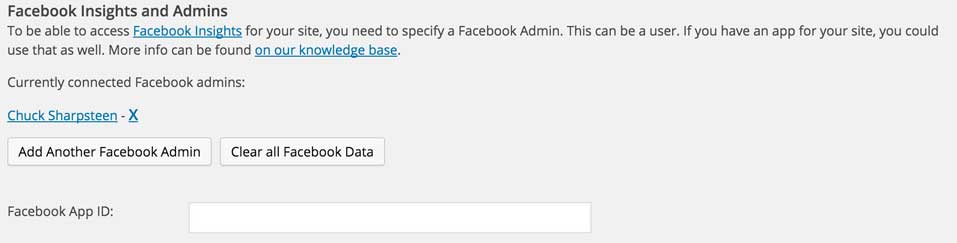
Facebook Insights and Admins
<html>
	<head>
		<title>Title of example page</title>

		<meta property="fb:admins" content="1077600236"/>

	</head>
	<body>
		<p>Content</p>
	</body>
</html>
Twitter
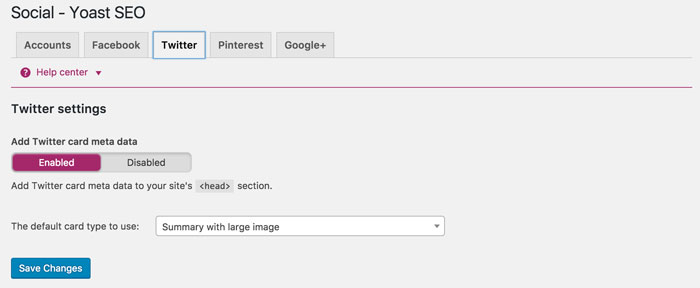
<html>
	<head>
		<title>Title of example page</title>

		<meta name="twitter:card" content="summary_large_image"/>
		<meta name="twitter:description" content="Compelling Twitter description"/>
		<meta name="twitter:title" content="Clickable Twitter title example"/>
		<meta name="twitter:site" content="@_WhiskeyNeat"/>
		<meta name="twitter:image" content="https://whiskeyneat.com/wp-content/uploads/2015/11/Yoast-SEO-HeaderSocial-Image.jpg"/>
		<meta name="twitter:creator" content="@_WhiskeyNeat"/>

	</head>
	<body>
		<p>Content</p>
	</body>
</html>
Pinterest
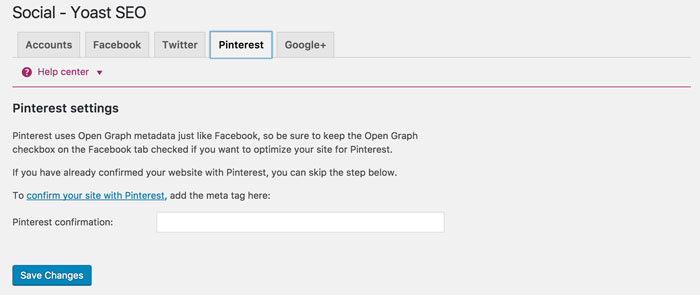
<html>
	<head>
		<title>Title of example page</title>

		<meta name="p:domain_verify" content="406d576e877ce09b5fb1b9c040a725c7"/>

	</head>
	<body>
		<p>Content</p>
	</body>
</html>
Google+
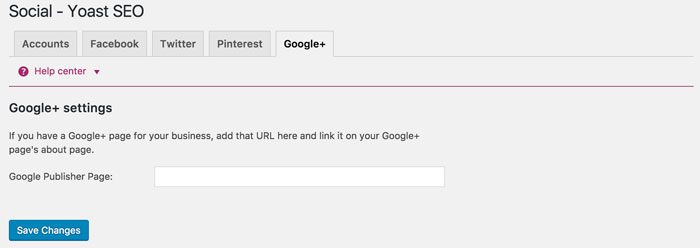
<html>
	<head>
		<title>Title of example page</title>

		<link rel="publisher" href="https://plus.google.com/109412257237874861202"/>

	</head>
	<body>
		<p>Content</p>
	</body>
</html>
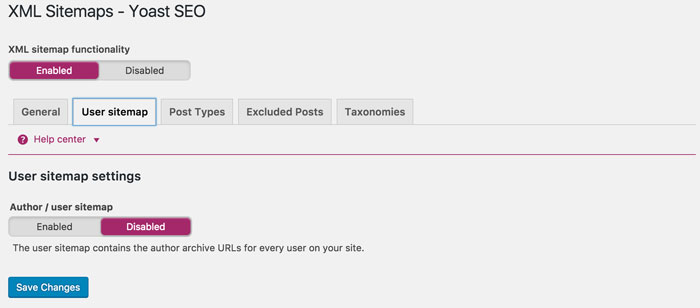
XML Sitemaps
General

Entries per sitemap page

User Sitemap
Post Types
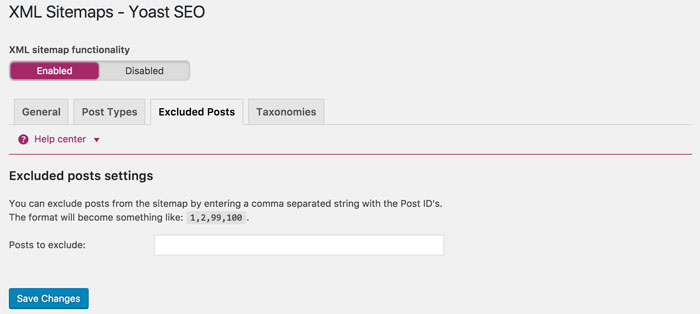
Excluded Posts

Taxonomies
Advanced
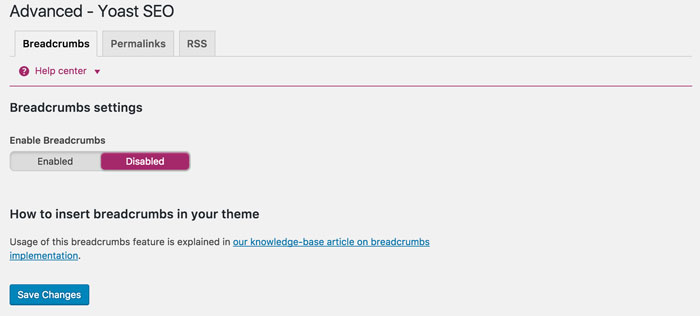
Breadcrumbs
Permalinks
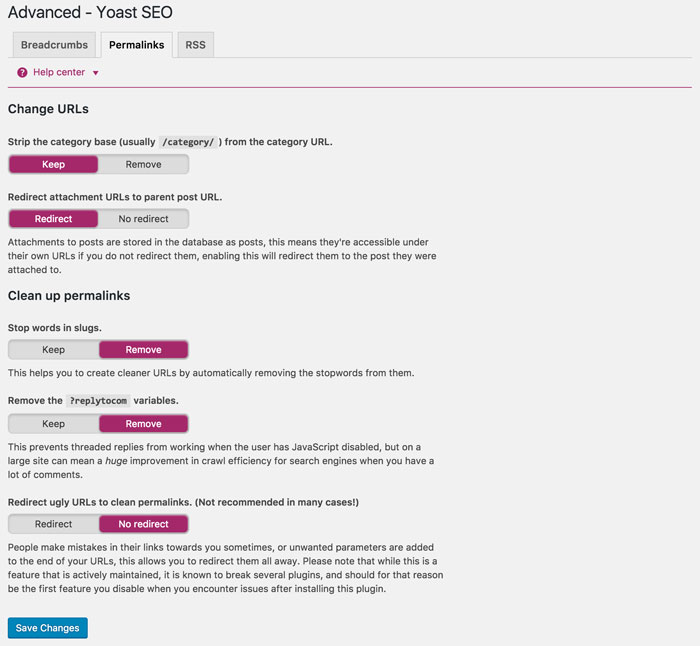
Strip the category base


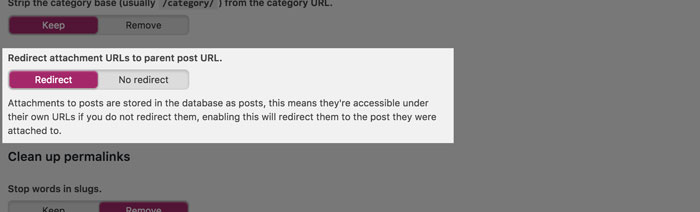
Redirect attachment URLs to parent post URL
Stop words in slugs

Remove the ?replytocom variables

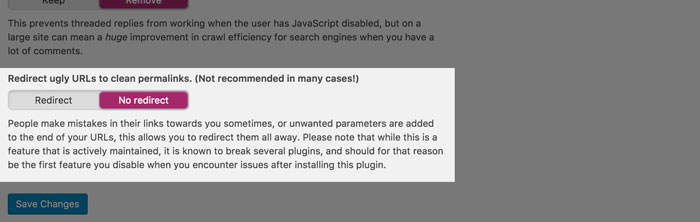
Redirect ugly URLs to clean permalinks
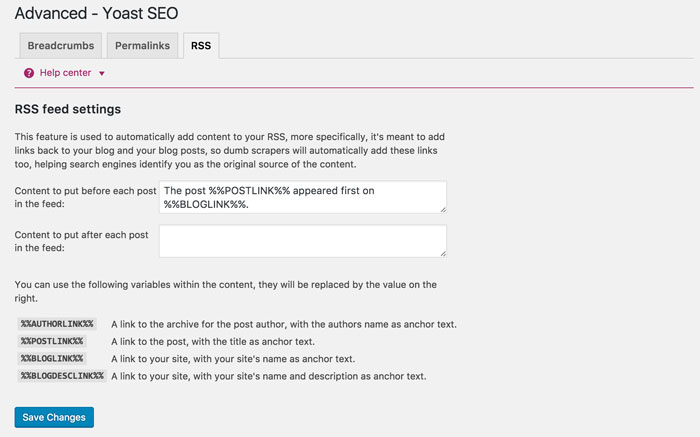
RSS
Tools
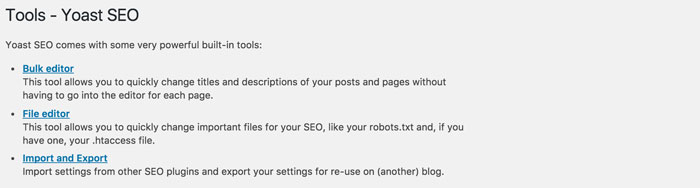
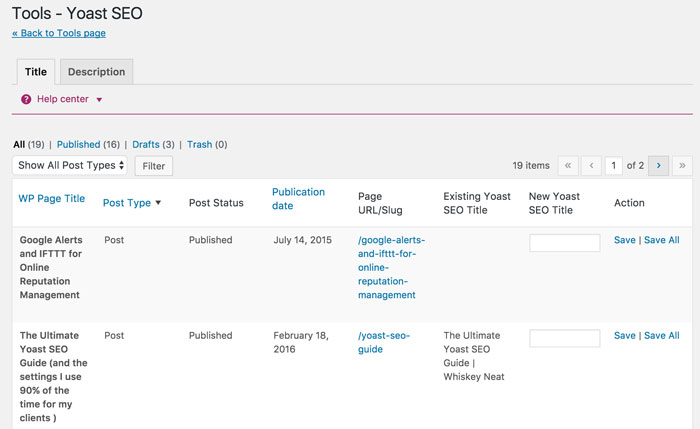
Bulk editor
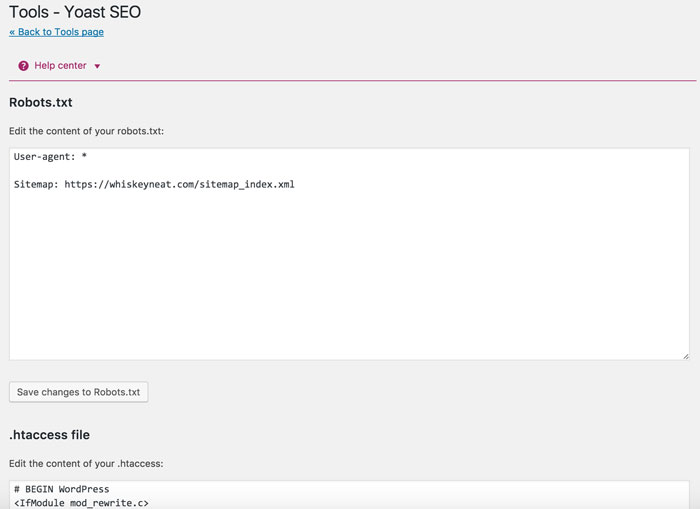
File editor
Import and Export

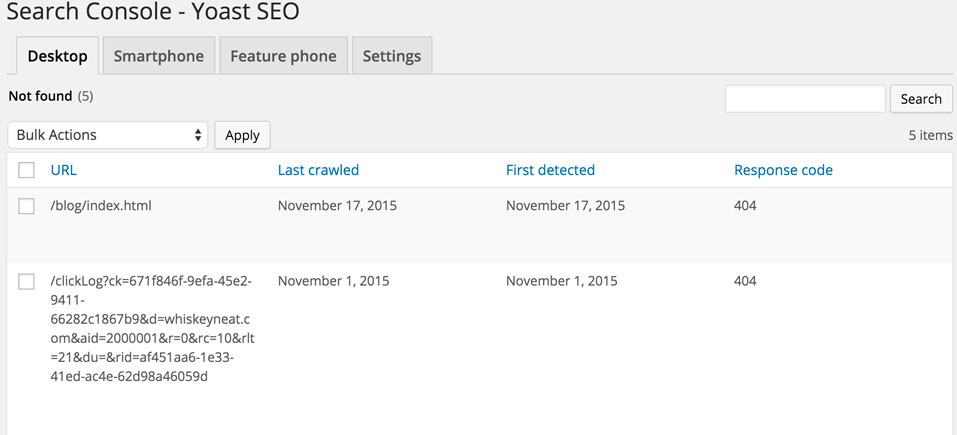
Search Console
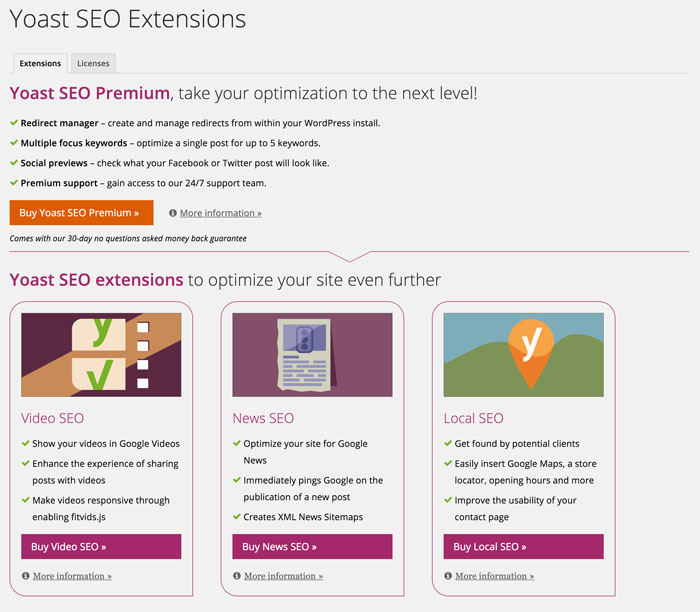
Go Premium
Yoast Cheat Sheet